Sending Text Messages to your Shoretel ECC or CISCO UCCX Contact Center?

We recently had an opportunity to create an emergency notification text messaging system for a financial service application built on ShoreTel iPBX and ECC technology. The requirement was to push out text based alerts to individual or groups of ShoreTel phones based on external events. These were typically stock tick updates and very time sensitive! The requirements document also required the ability to send text messages on manually on demand. The text messages would either be created by the Receptionist entering the text into a webpage for transmittal to the select phones or group of phones; or based on the receipt of a SMS text message. The SMS message would be relayed to the ShoreTel Phone API and then passed off to a group of phones for follow up by brokers as required to satisfy the client requests.

We have long contended that SMS application will find their way into the Call Center as triggers to initiate a scheduled call back as alternative to “please hold for the next available agent”. The opportunity to implement such an application was for us very exciting. Smartphones, undeniably ubiquitous, offer the possibility that customer service applications can be developed to enable customers to contact an inside “agent” without having to navigate a call tree! Why increase the number of telephone lines coming into your call center, just to put callers on hold until the next available agent can accept the call? People on hold, are people frustrated. If clients could just send a text message to the call center, targeted at the specific agent group responsible for problem or opportunity resolution, assured by return text message that they will be called at place and time certain, over all costs for all would be reduced and customer satisfaction increased. The concept of “abandoned” calls would be eliminated and real time reports, dramatically redefined!

We invision a Call Center in which there are actually very few incoming lines. The entire call center is based on Agents calling clients back based on agreed to call times defined in an incoming SMS Text message sent from a smart phone or smart phone application. The application, though functionally generic, could be made specific to a company product or service and also include the CRM links necessary for an Agent to service an account when they call the client back at the appointed time. This is a much more stream lined approach to Call Center operations in which telephone lines are optimized, Client service is customized and Agent time maximized.

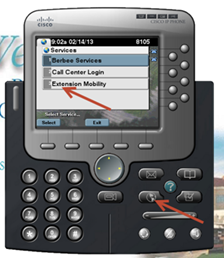
There are any number of SMS gateways that can be integrated as an internal server or as a subscribed service and combined with the display functions of a ShoreTel phone to enable this scenario. Additionally, Waze can send real time location updates that can also be routed to ShoreTel phone displays. Imagine the application of location based services to SMS text messages out to the display of ShoreTel phones in a call center environment! ShoreTel does an excellent job of documenting the SDK and API interfaces necessary to support this application. In fact the standard API itself is more than useful and is demonstrated in the accompanying video.

Contact us with your ShoreTel application requests especially if they require SMS connectivity to your Call Center!

Slamming it with ShoreTel Call Manager desktop deployment option!

One of the challenges in any ShoreTel deployment is the desktop Call Manager client installation.   You can breeze through the complexity of a ShoreTel multi-server, multi-site deployment only to be foiled when the desktop clients need to be installed or updated.   Nobody wants the thankless task!  As most users do not have Local Administration rights to install software on their desktop machines, the system administrator gets a new task.   So it is either “sneaker net” or an Active Directory Group Policy push out.  Meanwhile, the ShoreTel deployment is otherwise complete!  Frustration as the entire deployment is good to go, but the desktop clients have yet to be installed or updated!  When does the admin team get here?
Now there is a tool out there that makes sense and can be a great help to the field implementation team, charged with getting the ShoreTel system installed, on time and on budget!   Enter the rock stars at AdminArsenal with a very kool software solution named PDQ deploy and put an end to this client install fiasco!   The product makes it easy to do a network based push out of the ShoreTel client, by the ShoreTel installation team as long as they have an Admin account and meet these two conditions: The target computers must be on the same network. This is not an over the Internet install.  The application or patch must support a silent install. Most do, however there are some who do not. The admin must determine what the silent parameter is (/s, /quiet, etc.) to do the push. (Here are package details).
Think if this as a great tool for a deployment in which the ShoreTel implementation team needs to do all the onsite work when they might not have access to the client desktop help desk.   PDQ will let you install MSI files to multiple computers!  If your are a ShoreTel VoIP engineer, you need to add this solution to your tool kit!  Check out a free trial!
Keep those comments comming!

UCCX Cheat Sheet – Agent Log-in in using Extension Mobility!

There is a two step process for logging into the systems if you are a mobile worker.   The first step is to log into a Telephone and make the phone your Extension number.  The Second Step is to log into the CISCO Agent Desktop (i.e. CAD) and make yourself ³Ready² to receive calls from the Contact Center.

Step One:  – GoTo the phone you are logging into and press the button labeled ³services².  This will bring up a list of Services that your phone supports.  You should one or more services.  Select the Service entitled ³Extension Mobility² by highlighting it with up/down scroll button on phone or entering the menu number.

UCCXphoneCAD

UCCXLogin

Step Two:  You will be prompted to enter your User Name and PIN.   The User Name is your Active Directory (i.e. AD) login name, usually in the form of First Letter of your First Name followed by your Last Name.  For Example, pbuswell.    You will have to use the Touch Tone Pad on the phone to enter your name, and it is a bit cumbersome, but you will figure it out.    The PIN number, unless you have changed it, will be the default of 12345678

The Phone should  wink and blink¹ and reset itself.  When it comes back alive, you should see your Extension number in the Display of the Phone. This means you have successfully logged into the phone on this desk!  Please remember to reverse the process and LOG OUT when you are done.

Step Three:  Log into the CAD, by bringing that software up on your associated computer.   This will be a Short Cut on your desktop, or you will find it with your mouse under the Start, All Programs, CISCO, Desktop, Agent.   You will then be presented with a screen that prompts for your User Name, Extension and Password.    Enter your AD user name as used in the above step.  The Extension is to match the Extension on your phone, and the Password is your AD password.

This should log you into the Contact Center and bring up your Agent Tool bar similar to the one below, though your buttons may be smaller.  To indicate that you are READY to receive calls, you will need to push the READY icon (mouse over ICON) to see what they do!   When you do not want to receive calls, you will push the NOT READY icon.  At the top of the tool bar you will note your current Status!

UCCXmakeReady