
What no Voice Mail?
One of the surprises you get when working with Amazon Connect is the fact that, out of the box, there is no voice messaging capability. However, given the rich library of services available in the AWS ecosystem, you can most certainly configure a solution that will get the job done! Amazon Connect has built in recording capabilities and both logs and recordings are saved in an S3 bucket, so it would seem that the basic ingredients are there for configuring a voice messaging function. Lets take a look at several different ways of implementing this functionality without breaking the bank in professional software development services!
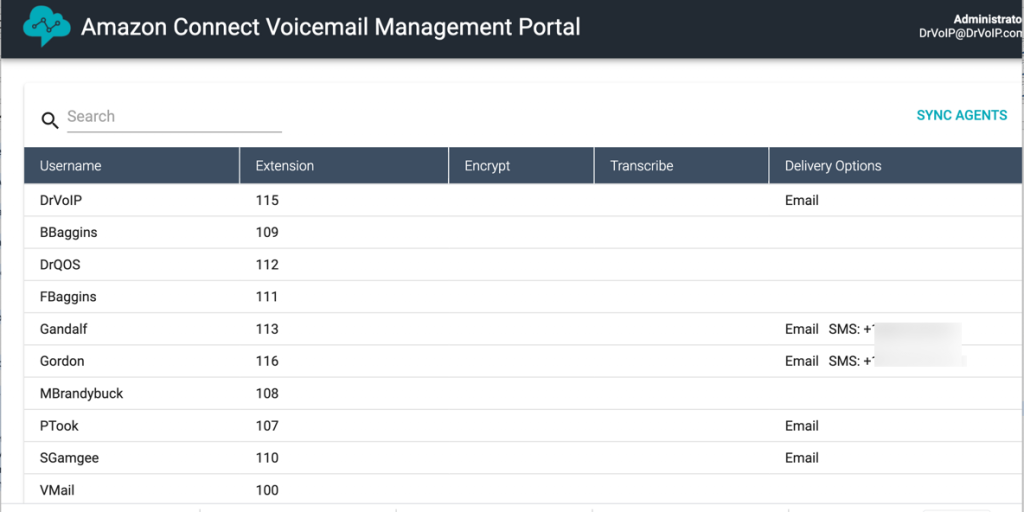
Option 1 – High Voice Message Feature Content with Transcription, Email and SMS delivery options
This Voice Mail service is built on several AWS services but is rich in features and functionality:
- Each Agent will have their own Extension number
- This enables folks to leave a voice message for a particular Agent;
- Voice Messages can be Transcribed and Encrypted;
- Voice messages can be emailed or sent as an SMS (Text) message;
- We create a Web Interface to administer voice mail options (i.e. set agent extension number, delivery options
There is an additional AWS cost as the solution will make use of Lambda Functions, DynamoDB, SES, SNS, Cognito and CloudFormation AWS Service options. Amazon estimates that this will have a cost of approximately .03 cents per voice message.
We offer several configuration Options:
- A separate phone number that is used for this function exclusively. Caller dials the VM number and is asked to enter the extension number of the Agent (we could also create a spell by name option). The system will then attempt to send the call to the Agent and failing to connect with the Agent, the system will take a voice message for that agent and deliver it based on the options set by the administrator. Delivery options are email or SMS. The message can be sent as a WAV file or it can be transcribed to text.
- Continue to use your normal call flow and set one agent (or create a fake agent) to accept messages for the Queue they are a part of. During the period in which the caller is holding in queue for the next available agent, as they might now do, they are offered the usual options, expect we replace the option to leave a voice message that you currently now transfer out of the system, to the agent nominated for queue mail. Clearly the email address could also be an email address of a distribution group so the message goes to many others.
- LEX speech recognition “dial by name”. The problem with extension numbers, is that callers will need to know them or you will have to create a directory system. Enabling “thanks for calling I can route your call in you speak the name of a team member or a function like sales” is way more impressive and provides a much better customer experience.
We offer a flat fee deployment option of $395 ($595 with dial by name option) to existing clients. We will need AWS Management User Access with a User that has System Administration permissions as we have to access all of the AWS service above to configure the solution.
Option 2 Cheap and Quick: The Basic Recipe
We configure a Voice Messaging solution for call center queues very easily using the following formula:
1 – First Create a Queue with a creative name like Voice Messages!
2 – Second Create a Customer Whisper Function to act as the front end greeting for your voice mail box.
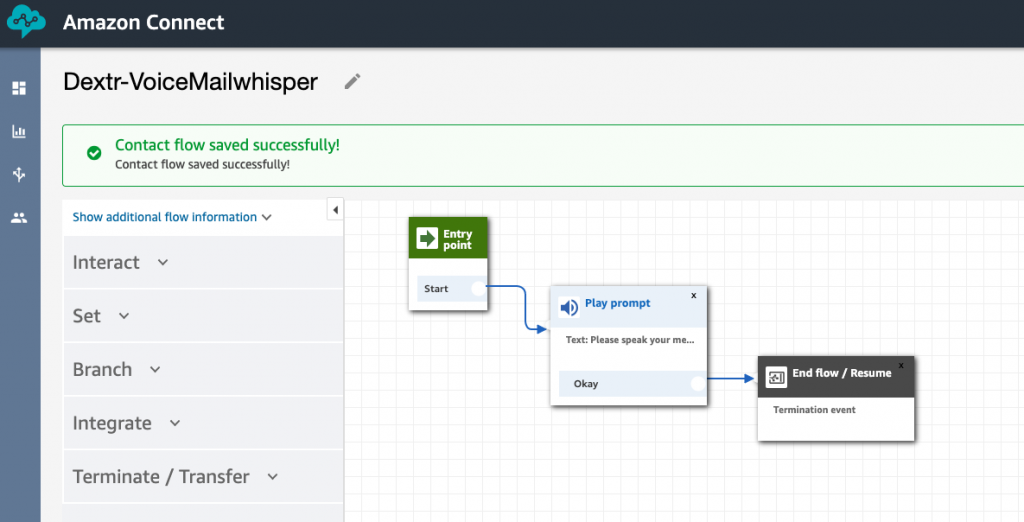
The Whisper function is going to provide your mailbox greeting and even the Beep! This Whisper, set to play to the customer (rather than the agent) is played to the caller as they are connected to the Agent user.
3 – Third Create a User with an appropriate name like VoiceMail-Sales.
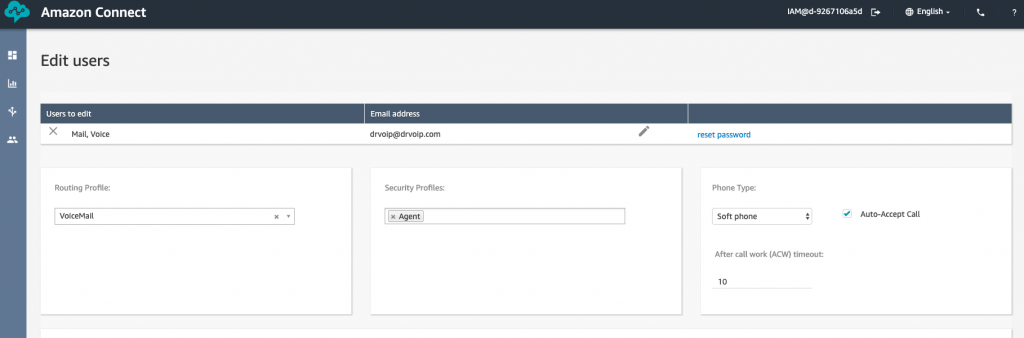
We want the user to be assigned a routing profile that contains only the VoiceMail Queue! Also note that the User MUST be set to Auto-answer as this is the key to making this work the way we want it to work!
4 – Lastly, create a contact flow to integrate the above into a simple, but workable voice messaging system.
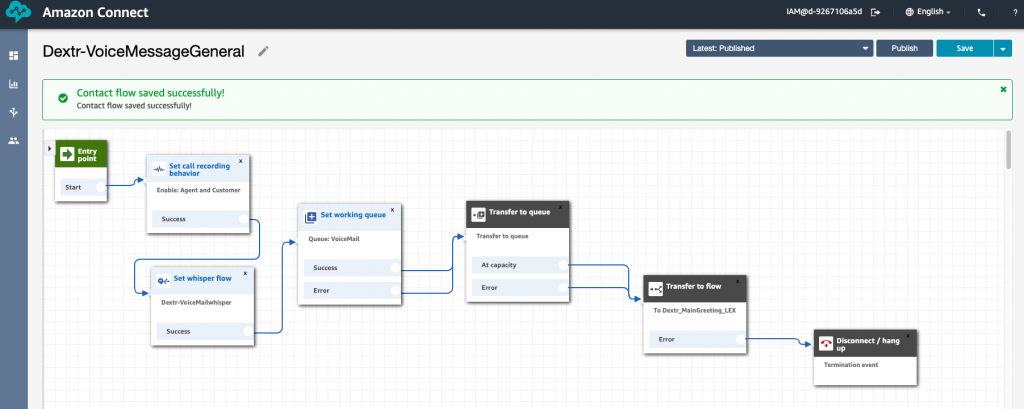
The contact flow can be very simple or you can make it a more complex by adding options like return to main menu! The goal however is to offer the option to leave a voice message or route a caller to voice mail if the caller arrives after hours. Nothing to sophisticated here. We set the Recording behavior to record both the caller and the agent. We then set the Whisper flow, the Queue and then transfer the caller to the queue. The queue will contain only one User in this example, but if you anticipate a lot of traffic, you could actually create multiple users with the same basic configuration essentially creating multiple voice mail boxes. You can also create different users and voice message queues to accommodate various different queues.
The caller will be transferred to the VoiceMessage Queue which will then select the only User in that Queue, who is logged on and available. This user was setup was setup with “auto-answer” so the behavior is to answer the call, play the Whisper to the caller as they connect to the Agent. The Whisper contains the prompt “Sorry we are not here to answer your call but at the Beep please leave your voice message and we will follow up first thing next business day. BEEP”.
The caller will then speak to the “agent” and the conversation will be recorded and saved to your designated S3 bucket!
Retrieving Voice Messages
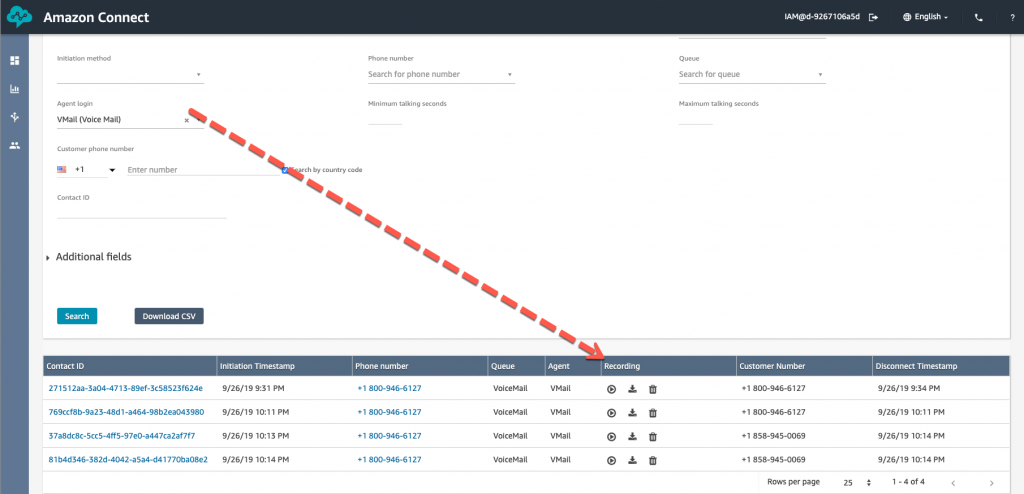
The basic tools available to you for retrieving your voice messages require a minimum permission of Call CenterQuality Analyst or Manager, as you may not want to make users Administrators! Just log into the Amazon Connect dashboard and head over to Metrics and Quality and then select Contact Search. Here you can set up a number of filters. For example we can search for the VoiceMail Agent configured above and also set the date range of interest, typically Yesterday! This will bring up all the contacts handled by that agent and you can then hit the playback button under the Recording column.
Variations on a Theme
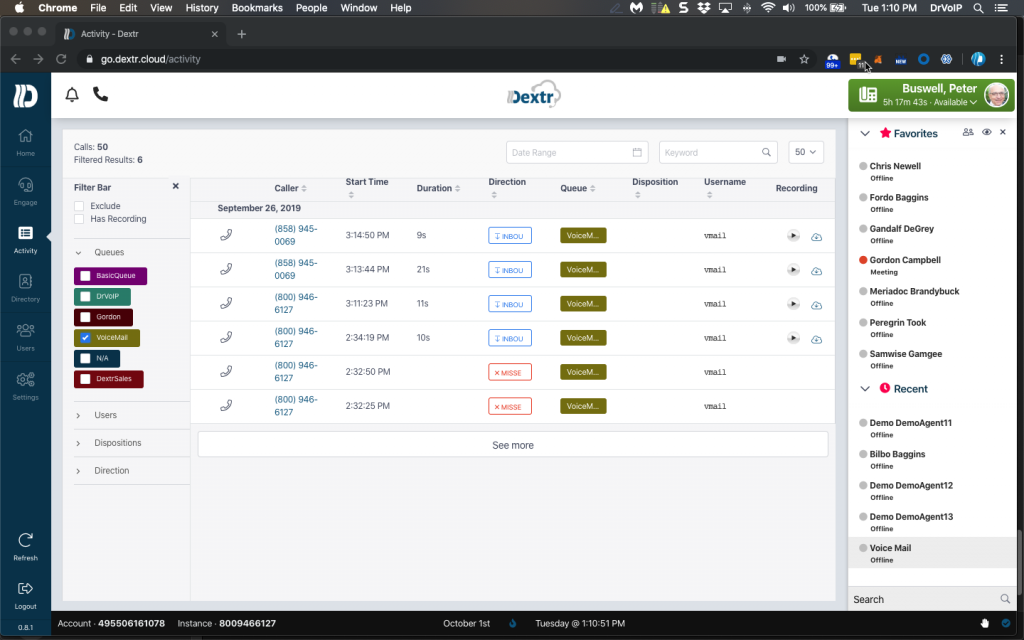
One of the user interfaces that makes this strategy a bit more useable is to use the Dextr.Cloud Dashboard. The Dextr dashboard has an Activity screen that enables a Supervisor or Agent with the proper permission, to sort by Agent. Then the playback button is right in the Dextr dashboard and there is no need to sign into the Amazon Connect dashboard to play back recordings.
Summary
We are struggling to find things we can’t do in an Amazon Connect contact center instance! The rich library of AWS services makes it possible to solve any call center goal you might development you might define as a requirement. If you can imagine it you can make it happen! Then again, you can always call on us and we can do it for you! – DrVoIP@DrVoIP.com