Upgrading is always a challenge!
Upgrading collaboration solutions like ShoreTel or CISCO has always been a challenge for system administrators. The technology for VoIP solutions has become increasingly more complex with many touch points that are outside the base communications systems. Folks want to use their iPhones, Androids, tablets, laptops and a variety of other endpoints both software and hard! Collaboration requirements are more than just voice! Folks want to chat and IM, hold Web meetings and Video conference. This is a long way from the standard single line touch tone telephone that dominated the landscape when we first entered the industry.
Depending on the size your your deployment you will have several servers to upgrade, some may even be across time zones that span the country if not the globe. The configuration management and cross referencing of O/S versions and application compatibility, including desktop software can become a major research project in and of itself. There is no easy way to approach this, it is hard work and it must be done. Upgrades require very careful planning and preparation before setting the all important “maintenance window” and the notification of the end user group.
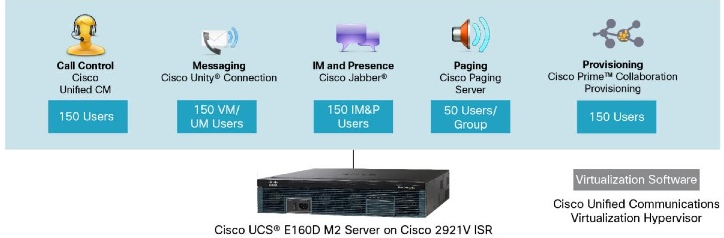
With CUCM Version 10 CISCO has migrated exclusively to virtualized servers, eliminating bare metal installs completely. For those who have not upgraded their deployments in quite sometime, you will not only have to upgrade servers, but twill also have to migrate to virtualized environments. CISCO Collaboration no longer runs on MCS class servers, but on Unified Computing platforms, like the UC220, which run vmware ESXi. To assist with the complexity of this process, CISCO has introduced the Prime Collaboration Deployment tool. It is not a substituted for the research you will need to do, but it does take a great deal of pain out of the labor of a combined migration and upgrade.
Prime Collaboration Takes the Pain out of Migrations!
Recently we had and experience that is not uncommon with the upgrade of a CISCO CUCM deployment. We had a client with a Version 7.1.5 CUCM Publisher and two subscriber servers. (The cluster also supported Unity 5.0 and UCCX 8.0. on traditional MCS servers, but that is the subject of another blog). The goal was simple: migrate the cluster from MCS hardware to vmware servers and upgrade to Version 10.5 across the cluster! Also, the production environment, running in a medical facility could experience no service interruptions! Though no client ever says, “Come over Monday morning and take our computer network and voice system down and take your time upgrading it”, the no service interruption required some further conversation to set expectations appropriately!
Ultimately, we determined to build out a separate network and to use CISCO Prime Collaboration Deployment (hereafter called “PCD”) to accomplish the migration. The process was interesting and full of opportunities to learn new techniques and options. We would like to share a few with you in hopes that you might benefit from our experience. First understand that the PCD can be used to migrate and to upgrade. Understanding this vocabulary is important. Upgrades assume that you are already on a vmware ESXi platform and at the appropriate software level to upgrade both CUCM and your other applications. Clusters that are on specific versions of CUCM 6.1 and 7.1 are about the earliest versions you can tackle with PCD version 10.5. If you are running a Call Manager with an older version, the process is considerably more complex and outside the scope of this blog! Applications like Unity and UCCX must be at least 8.6 for both migrations and upgrades.
Our first step was to directly migrate from an MCS based Version of CUCM running 7.1.5 to an ESXi implementation of CUCM Version 10.5, and to do this in a single step! We had two major locations in this deployment, so we set the servers up so they could be relocated later to support the “go live”plan. CISCO Prime Collaboration Deployment supports two modes of migration: (a) use the existing host names and IP address topology on the migrated cluster; or (b) change the host names and IP topology of the new cluster. As the use of the same host name and IP address options requires shutting down the production server at some point during the migration, we elected to go with a change of names and ip addresses. This would enable us to run both in parallel and test without impacting production.
PCD Lessons Learned—Get the DNS Records right before you start!
Lesson Learned—Make sure you go through the PCD documentation and note all the prerequisites! Something as simple as using the correct browser will save you some pain! We had a situation in which after the PCD install and a few start up configurations, like adding the ESXi hosts to PCS, were getting database access errors! “An error occurred retrieving cluster data from the database” is really enough to scare you to death! We were using IE, and when we used Firefox, the error disappeared. WTF? We noted many differences between using each browser. If something fails, try the other browser before believing the error! Make sure you use the supported browser for the PCD version in use. Make sure that all required OVA, COP, Firmware and ISO files are in the correct directory on PCD, generally \fresh for migration. You will need FileZilla to do this and we recommend having putty or your favorite SSH solution available. Trying to run Cli command through the vmware client Console connection is very painful! SSH to PCD if you need Command line access!

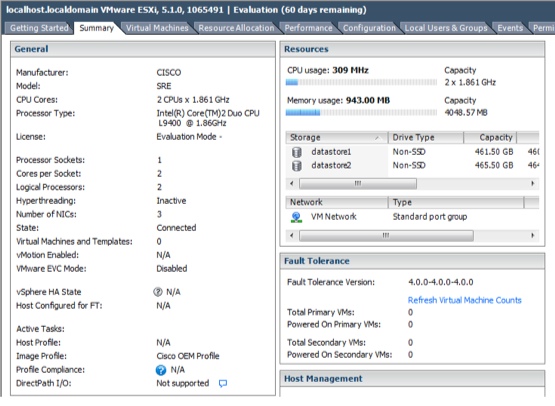
Lesson Learned—Generally you will deploy your ESXi hosts first, getting your management port established and your vmware client launched. Once this is accomplished you will then deploy PCD. The installation of PCD is not unlike the installation of any other CISCO Collaboration application. There are many great videos out there which demonstrate this process. What we learned here is DO NOT install the ESXi free license on your vmware host before completing your PCD install. If you install that license to operate a free version of ESXi, you will get warnings about features that may not be available. Remove the free license from vmware if you have not already done so! (See our blog on setting up a vmware lab system for similar input on using the vCenter evaluation software on free ESXi).
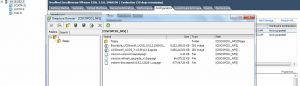
Lesson Learned—If you have worked with vmware in the past, you know that generally you will need to put your OVA and iSO files on a local storage resource available to your vmware client. After installing PCD you will note that an NFS data store is created and available as a storage option in your vmware host inventory. You will also note using FileZllia that there are two directories: fresh install and upgrade. These are for storing the various COP files, Firmware loads, ISO and other files you may need during your migration. This greatly reduces sneaker net and the movement of software back and forth from the vmware client desktop to your ESXi host. Watch total storage use however!
Make sure your have your IT Network Services Accessible!
Lesson Learned—You must have DNS, NTP and SMTP services available on your migration network. The installation of all CISCO applications require these basic network building blocks. Make sure your deployment network has access to these network services. If at all possible, use the same services that your existing cluster uses. If you do NOT setup DNS A records for your new cluster, if new host names are being used, your migration task list will fail at the launch of your first new CUCM server. If you just waited six hours for your first task, the backup of your cluster to the PCD to finish, you will want to jump off a roof if you think you have to start over (actually you don’t have to, see below). In fact before you even activate your task list, go to the CLI of the PCD. Use “Utils Network Ping Hostname” to verify that PCD can in fact resolve new host names and even this is not a guarantee!
Ultimately we realized that we should have installed the DNS Client option during the PCD installation. We used Utils to set it after the fact and had the painful realization that the addition of “Set Network DNS Primary” will cause the server to reboot! Six hours of data collection, and we were about to blow it up. This is why SMTP is important. You can have PCD email you at the end of each step so you dont have to keep playing policeman! We committed to the change and watched the server reboot. Much to our suprise, PCD came back up with a CANCEL, RETRY and CONTINUE button indicating that we were at the point we were before we rebooted the server! Lesson Learned and Shared here! Get DNS working and all A records for both host and FQDN names resolved before you start the migration task list in PCD!
Once PCD is installed the migration process is simple to follow, but may take a very long time. Typically we estimate 1 hour to backup and 1 hour to restore each server in your cluster using the manual process. PCD does not save time, so plan ahead! The steps can be summarized as (a) discover your existing cluster; (b) create your new cluster; (c) establish migration tasks; and (d) manage the tasks through to completion. You MUST have the OS administration user name and password for every server in the cluster! Don’t even think of starting without it! After PCD “discovers” your existing cluster you will then be asked to create a Migration cluster using either existing host names and IP or changing them. Pick your options and then set up your cluster.
Once you set up your cluster, you can then establish your task list. Tasks can be automated (again suggest setting up email notifications) and run at scheduled times or started manually. Each task is reported and may be programmed to stop before continuing. Certain stops are mandatory. For example, if you are using the same host names and IP address, you will be required to turn off the production server before bringing up the new cluster. At this point it is a waiting game as PCD first backs up and copies the production cluster. During our migration we failed two times after the six hour backup task. The second task of firing up the new CUCM Publisher would not load the ISO. The first time was because of DNS issues. The second time was for DNS issues (are you following this)?
No Need to Delete the entire machine, just delete the disk!
The most important lesson we learned that will make this the most rewarding blog for you is this: When a task like starting up a new OVA file that defines a new machine and ISO fails here is how to recover. Shut down the machine in the ESXi inventory list. A better solution is to edit the settings on that machine. Delete the hard drive completely, then reinstall a hard drive. Generally you will have to recreate that machine, using the OVA file, but this trick save you that effort. Once the machine is edited, you can return to the monitor page of PCD and hit the RETRY option. This will restart the migration task from where you left off . If you fixed your issue (DNS reverse look up), you should continue with no further issues!
Lesson learned—If you are going to talk to TAC, they will want to have both the Tomcat logs and the PCD logs. Add a Serial Port to your PCD so you can output log files to a predetermined file location on failure! Do this before you need it! Learn how to use the cli to collect the Tomcat server logs!
Summary
CISCO Prime Collaboration Deployment is an excellent solution for migrating your CUCM from an earlier version to the latest ESXi based version. If you attend to the prerequisites including researching the required upgrade files, you should have a very comfortable experience. If you have ever done a migration from MCS to ESXi using the “jump” process, you will find this remarkably more efficient! You will need to get your other applications up to a supported version before you can upgrade them using PCD, but once you do, this tool will become your new best friend!