Don’t Procrastinate!
Sooner or later you will find you need to upgrade your VoIP deployment, regardless of the vendor. Differing upgrades is just prolonging the inevitable and increasing the complexity and the pain level. Let’s take the example of migrating a CISCO MCS based cluster that includes a CUCM at version 7.1.5, a UCCX at Version 8.0.2, and a Unity Voice Mail at version 5.0, and some of the components have HA options! Having put off upgrades for some time, this client will have to migrate from MCS server hardware to vmware ESXi virtual machines and upgrade to the now current 10.X release across the cluster and applications. In the case of Unity which has been replaced by Unity Connection, this is a completely new application addition. The complexity of this upgrade is about as challenging as they come! Additionally, the client expectations are that impact to the production environment will be non-existent!
Build out a “Mirror Lab” system
The decision was made to build out a completely separate “lab” system and to use the same ip topology as the production system. This in itself is an interesting set of configurations as you will still need to maintain connectivity with all network services, particularly DNS and NTP. This might best be accomplished with a set of temporary service providers on a completely isolated network. In this instance we made use of Prime Collaboration Deployment (PCD) tool to migrate and upgrade the CUCM cluster consisting of Publisher and two Subscribers. As the “lab” network was to mirror the production network, we actually had three of four subnets to configure as the HA servers were to be located at a different site than the Publishers. The PCD was relatively painless and very useful. We did learn quite a lot about the capabilities of this tool, and in the end, consider it to be of great value and we will continue to use it in future migrations. See our previous blog about lessons learned!
Plan 3 hours per server per Upgrade Step up!
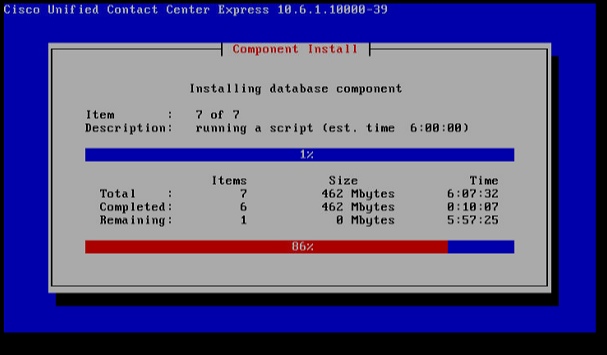
Understanding the time required to complete this process should be established. The actual time to do a backup and/or a restore of a specific server will be determined in large part by the size of your deployment. A backup for a single cluster with 100 users will take considerably less time than a backup of a multiple cluster deployment with a 1000 users! For planning purposes we used one hour per server for installation of software including ISO, COP files and any required Engineering releases. Each backup added an hour as did each restore. Keep in mind that you may be making multiple upgrades to achieve your end goal. Each upgrade will take place in the “inactive” partition. Then you will be required to switch partitions. This process will take as long as a backup to progress! In this example we were moving from 7.1.5 to 10.6 and that would normally be a multiple step upgrade. In the case of the UCCX it most certainly was! So we have, in this example three CUCM servers, 2 UCCX servers, and 2 Unity servers for a total of 7 servers. At the base level that is a minimum of 21 hours of server operations for each upgrade step! Plan accordingly and set expectations to all stakeholders! There will be long periods of watching computer screens and the progress bars that hopefully give you some feel of where you are the process. CISCO upgrades list the number of tasks and also estimate the time per task. This is very helpful!
Take time to learn COBRAS!
Once we had the CUCM cluster established, we turned our attention to the migration from Unity 5.0 to Unity Connection. This was achieved by building out a new ESXi based Unity Connection Version 10.5. CISCO has a great tool to assist with this migration in the form of COBRAS which, if you have not used before, will take some study. Fortunately there are many training videos on the CiscoUnityTools.com website, where you will go to download the required software. You will need the CISCO Unity Export tool and the Unity Connection Import tool. The Export tool needs to be installed on the Unity Server as it will build connectors to the existing Unity configuration and User database. The tools are not difficult to learn, but do require some orientation. You can export the configuration including users, call handlers, mail boxes, prompts and even messages. If you set customer expectations that they will not have historical messages, you can eliminate importing messages which will simplify the process.
The Unity Connector Import tool can be installed on a Windows laptop. You will need to download and install IBM Informix drivers to connect to Unity Connection Server using a Microsoft OBDC connector. In this example, we moved from a system that had many less features to a system that had many more features. Our expectation was that this would be the most painful part of the migration journey, but it turned out to be comparatively easy. The Unity Connection Server came up with most of the old call handlers matching definitions for new call handlers, and the user database imported with out error. We choose not to import old messages and set an expectation with the client that there was a point in time in which they would need to clear out old messages as they would not be on the new system.
List and have available all COP files!
Now the upgrade and migration of the UCCX was in fact the most challenging part of the journey. With the Call Manager now on Version 10.5 the current UCCX 8.0.2 system could not communicate with the call manager. At first this was not thought to be an issue. We backed up the UCCX 8.0.2 server and built out the same version machine on ESXi. Then we did a restore and now had a virtualized UCCX 8.0.2. You will not be able to log in to the UCCX administration page, however, as the user database is on the CUCM, and the two systems are currently incompatible. There is a very long list of steps to get to UCCX 10.6 and each step required a backup and restore! The clock is ticking!
We upgraded the 8.0.2 software to 9.0.2 and found that we need a license key to be able to log into the Administration portal. Given that we were only temporarily stopping here, and ultimately would license under Prime License Manager, we did not plan for this. However, we wanted to make sure that all data was successfully migrated to the new version. So we obtained a demo license through TAC to take a look at our repositories and verify that all scripts, prompts and documents etc. were successfully migrated. We noted that the Call Control Groups were not in place, but determined that was a result of a Jtapi version incompatibility. We next need to apply COP files and migrate to 9.0.2SUS2 in preparation for the journey onward. At this point, we found a error in the database replication of UCCX servers and elected to remove the secondary server, which we would add back in at a later step. This required TAC assistance to log in as root and run a script to strip the database of any reference to the second UCCX server.
There are hardware reconfigurations that change as you move through to 10.6 so be aware of them. As you might have done on MCS upgrades to 9.0.2, you will add RAM and maybe disk drives depending on the size of your UCCX. So moving from the ESXi virtual 8.0.2 clone we attempted to build out the ESXi machines using Version 10.6 OVA files, but ended up having to download and use an OVA for version 9.0.2. The upgrade to 10.6 required yet another COP file before the upgrade could be started. Again, it is important to study the various upgrade paths as you may be moving through several upgrades, patches and COP files, so keep track and write it down! After the COP file, yet another backup! Finally, we were able to move to 10.6! Once on 10.6 we now needed to add the HA server back into the mix. Actually, in the future for any multiple upgrade steps it may be best to remove the HA server before starting the upgrade. Generally this is not a CISCO supported method, but you can see how much time it cuts out of the project as you do not have to upgrade two servers, backup and restore two servers at each step of the process!
Now that we have a complete system upgraded and virtualized, we can do some testing. Specifically working with firmware and CTL issues if any! Though we did not have any gateways to connect with the outside world, we were able to bring up phones, assign users and make phone calls to the UCCX and the Unity Connection. What remains is scheduling the maintenance window to facilitate the “go live”. The plan was to take the old system offline and put the new system online. Keep in mind we used the same machine names and IP topology in the “lab” as we did in the production environment!


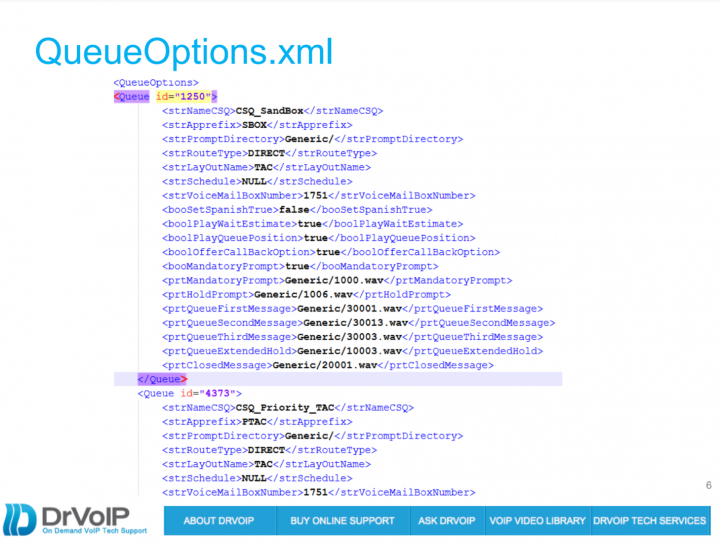
 Included Feature Options: